CSS Selector's Complete Guide
We will discover what is CSS & how do we target the html elements and effectively apply selectors to select the elements we want to style.

Software Developer

What is CSS?
Cascading style sheet (CSS) describes how the HTML elements have to be presented on the web pages- such as color, font, layout, etc. applied on it.
What are CSS Selectors?
In a CSS declaration, selectors point to the items that will be styled. Selectors are the first part of a CSS declaration before curly braces. The declaration below uses the selector h1 HTML element as an example.
h1 {
    text-align: center;
    color: DarkRed;
}
Types of CSS Selectors:
1. Universal Selector (*)
The universal selector selects all the elements on a webpage from the heading to the footer.
This selector causes every HTML element on the page to have white text and dark background.
*{
    color:white;
    background-color:rgb(161, 149, 149);
    text-align: center;
  }
2. Individual Selector
The individual selector targets an HTML element directly. It applies the style to that elements present everywhere on the page.
For instance,
the <li> elementis specifically applied the styling everywhere.
li{
    padding-left: 2.5rem;
    color: brown;
    background-color: bisque;
}
3. Id Selector (#)
In Id selector, the prefix"#" pound symbol is defined before id attribute which is uniquely defined in an HTML element. There should never be a duplicated id within a page.
For instance,
the #submitform id of <input id=submitform type="submit" value="Submit the form" />is uniquely styled. It is overriding the input selector element styling which has white color unlike the id styled in black color and white background-color.
#submitform{
  color: black;
  background-color: white;
  border-radius: 1.5rem;
  margin-left: 7.5rem;
  padding: 0.5rem;
  font-size: 2;
}

#submitform:hover{
  background-color: rgb(220, 218, 218);
}
4. Class Selector (.)
The (full stop symbol) is followed by the class name in the class selector. Class selector is very useful when you want a bunch of elements that have matching styles.
You can have a look below, that it can be used for images, cards and many things.
.column{
  padding: 5px;
  min-width: 30%;
}

.column img{
  height: 300px;
  width: 300px;
}

.container-one{
  display: flex;
  flex-wrap: wrap;
  justify-content: center;
}
- How is the Id selector different from the Class selector?
- Do you want to know?

Imagine a scenario of a school where students are divided into different classes and each student is allotted a roll number for a unique identification. So, in a similar way, a class consists of different-different entities which can be uniquely identified by an id. Hence, both class and id are used as identifiers, but the main difference comes in usages of these identifiers.
Below you can find these four paragraph elements have a common class and a unique id assigned to them. This is how it works according to use cases.
5. Attribute Selector
An attribute is a content added to the opening tag and an attribute selector selects the elements based on the certain attribute which is present or not in the element. It will be easier to understand with the help of below code.
p[lang~="en-us"] {
  color: blue;
}

6. Chained Selector
Chained selector is also known as an And selector. It allows us to select the elements with two or more classes assigned to them.
.heading.note{
  font-weight: bolder;
  font-size: 1.5rem;
  color: orange;
}
For example, to select all elements with a class of both 'heading' and 'note'.
7. Combined Selector
This can select more than one element by applying a styling which is common among all.
h1, p{
  font-weight: bolder;
  font-size: 1.5rem;
  color: orange;
}
8. Descendant Selector
It is also known as inside an element selector. It applies commonly the style on all the elements that are descendant/nested inside a specified element.
ol li{
  color: #aabaaa;
}

ul li{
  color: rgb(150 168 177);
}
9. Direct child selector (>)
Child Selector selects only the elements that are direct/immediate children a specific element.
ol > li{
  color: #ad1414;
10. Adjacent Sibling selector (+)
- What is a sibling element? A sibling element is an element that shares the same parent with another element.
An adjacent sibling selector selects an element which is immediately following the sibling element. Here, the second sibling element which is following the first sibling element is targeted.
span + ul{
  color: #ad1414;
}
11. General Sibling Selector (~)
A general sibling selector selects any elements that are siblings of an element.
h2 ~ ul{
  color: white;
}

h3 ~ ul {
  color: rgb(85, 255, 0)
}

Pseudo Selectors 😁
Pseudo Selectors fall into two categories: the first one is pseudo-class selector and the second is pseudo-element selector.
1. Pseudo-class selector
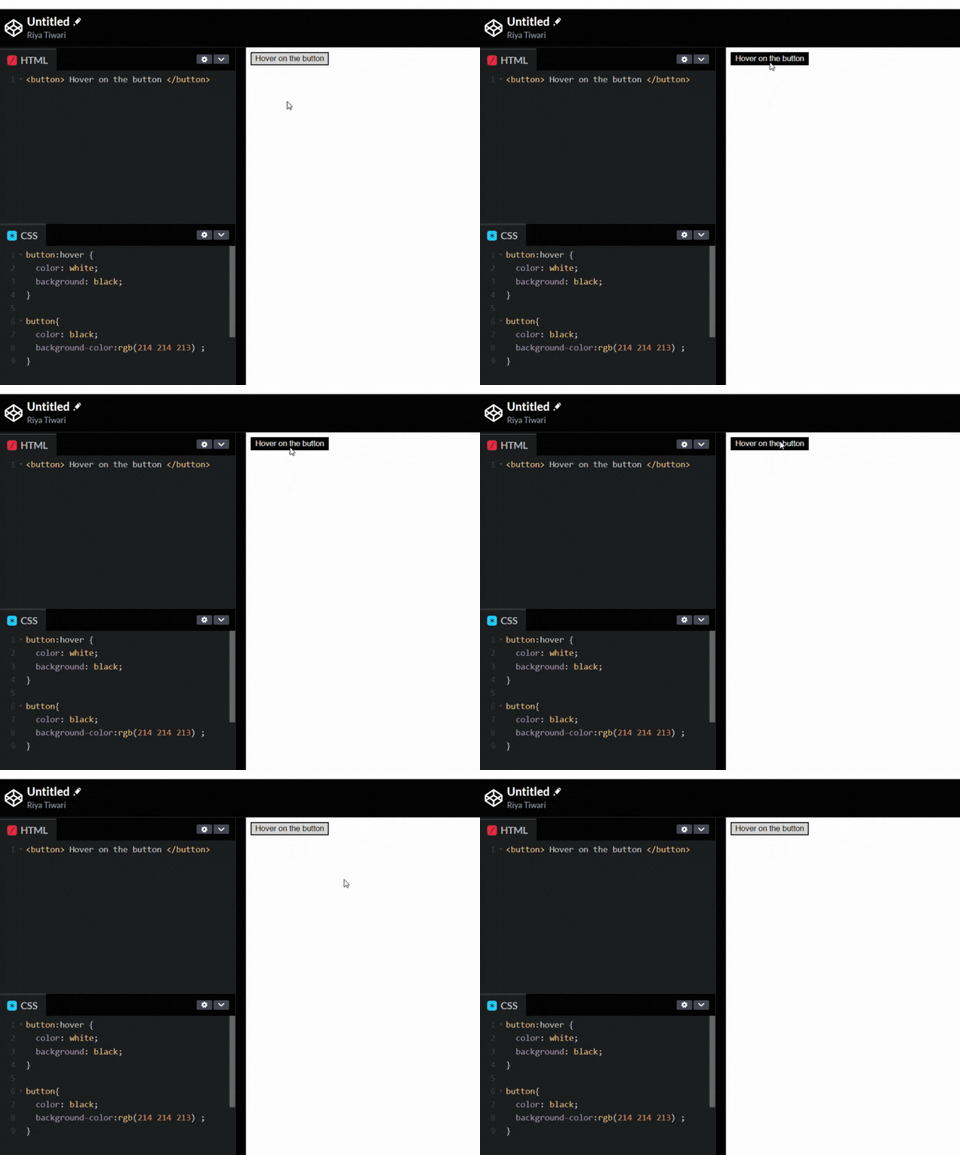
Pseudo-class Selector is used to define the special state of an element and begins with a colon. A simple syntax of pseudo-class is as follows:
selector:pseudo-class {property: value}

OR

selector.class:pseudo-class {property: value}
There are a many number of pseudo-classes. The most commonly used pseudo-classes are: :link, :hover, :active, :focus, :first-child, :visited.
A quick example would be: .
button: hover {
  color: white;
    background: black;
}

button{
  color: black;
  background-color:rgb(214 214 213) ;
}
2. Pseudo-element selector
Pseudo-elements can be called as decorative elements that lets you inject the content onto a webpage without any need to do it in the HTML and moreover applying the styling on it. Sounds Interesting?
Do you also wonder that how does it handle the CSS generated content for screen readers?
It is recommended to use pseudo-element selectors for decorative, non-essential content. It is not readable by the screen readers or search engines.
One important thing to note is that the "pseudo" name fits as "fake" in the context that when these pseudo elements are created, they are the hidden elements only visible to the user and not actually present on the DOM.
Pseudo-element Selector is used to style specific parts of the element you selected which denotes two colons. A simple syntax of pseudo-element is as follows:
selector::pseudo-element {
  property: value;
}
Here, we will briefly learn about the essential pseudo-element selectors which are used mostly.
1. Before pseudo-element (::before)
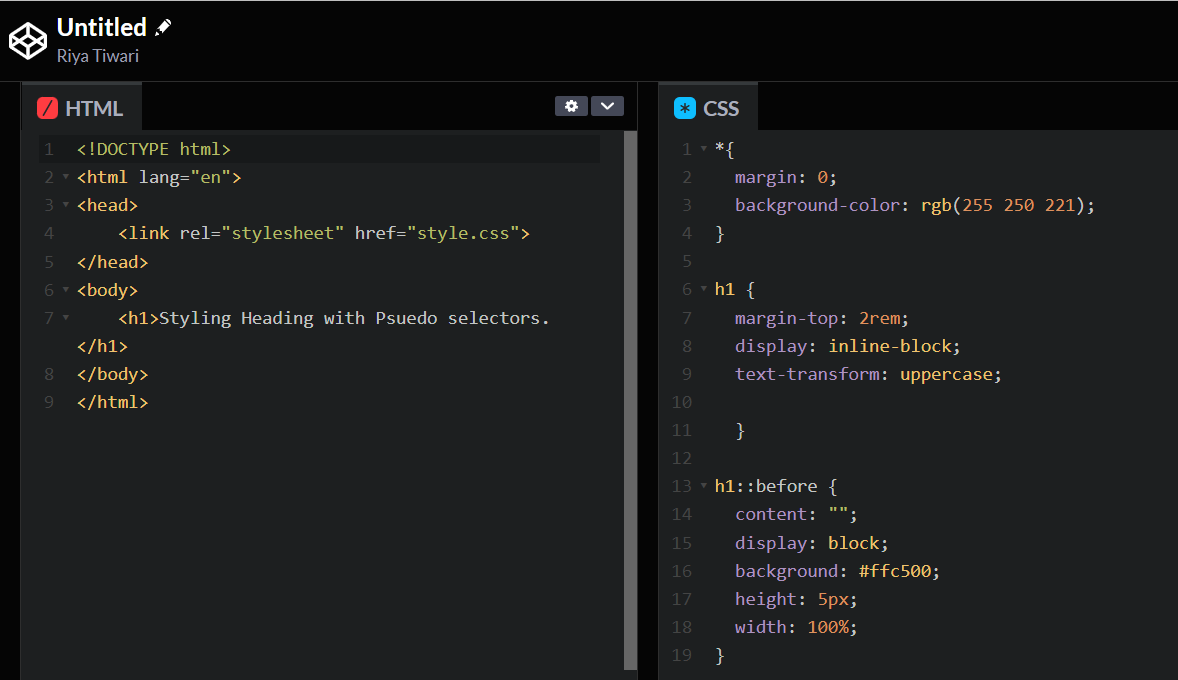
The before pseudo-element selector comes before the content of the CSS selector. So, if you have a heading element it would look like this h1::beforewith h1 being the selector and ::beforebeing the pseudo-element.

h1::before {
  content: "";
  display: block;
  background: #ffc500;
  height: 5px;
  width: 100%;
}

2. After pseudo-element (::after)
The before pseudo-element selector comes after the content of the CSS selector. We will style using this element on the previous example heading now.
h1::after {
  content: "";
  display: block;
  background: #ffc500;
  height: 5px;
  width: 100%;
}

A noteworthy point: Both the ::before and ::after pseudo-elements create a child element inside an element only if you define a content property. After implementing both the selectors, let's see how the heading looks like.

3. First-letter pseudo-element (::first-letter)
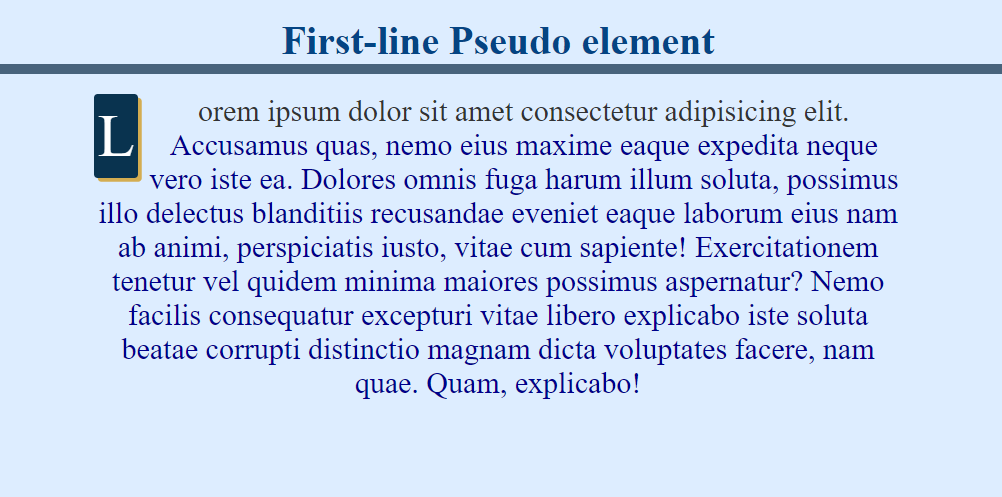
The first-letter pseudo-element applies style on the first letter of the first line of the element you select that falls only into the block-level elements category.
p::first-letter{
  color: white;
  background-color: #1f6391;
  font-size: 180%;
  border-radius: 3px;
  box-shadow: 3px 3px 0 rgb(212, 173, 81);
  margin-right: 4px;
  float: left;
}
4. First-line pseudo-element (::first-line)
The first-line pseudo-element applies styles to the first line of a block-level element.
p::first-line{
  color: #323334;
}
5. Marker pseudo-element (::marker)
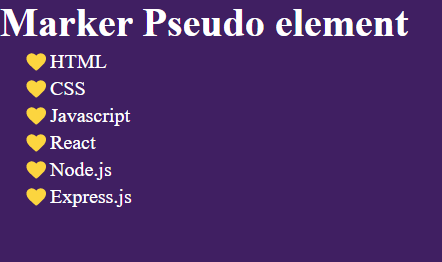
The marker selector is used to select and style the marker of list items: ordered list and unordered list.
ul li::marker{
  content: '💛';
}
In this example, the ' • ' bullet points will be replaced with the heart '💛' emoji.
6. Selection pseudo-element (::selection)
The election pseudo-element applies the style of the selected texts by the user.
::selection{
  background-color: yellow;
  color: black;
}
You did a great job! A shout out to you for coming this far! 😁

I hope it was a helpful read to you. Your comment on suggestions or appreciations are always welcome. 😊


